How to Clean Your Deep Fryer.
I have a love hate relationship with my deep fryer. I love the yummy goodies that come frying out of it but I hate the crusty mess that the old oil leaves behind. I guess I learned to ignore it because I didn’t see how bad it was until I heard my other half mutter “maybe we should get a new one of these”. When I turned around, I saw that he was staring into the deep dark depths that is my deep fryer. So, I knew it was time to take matters into my own hands and get this mess cleaned up. It wasn’t very hard to do but it WAS time consuming…you’ve been warned. 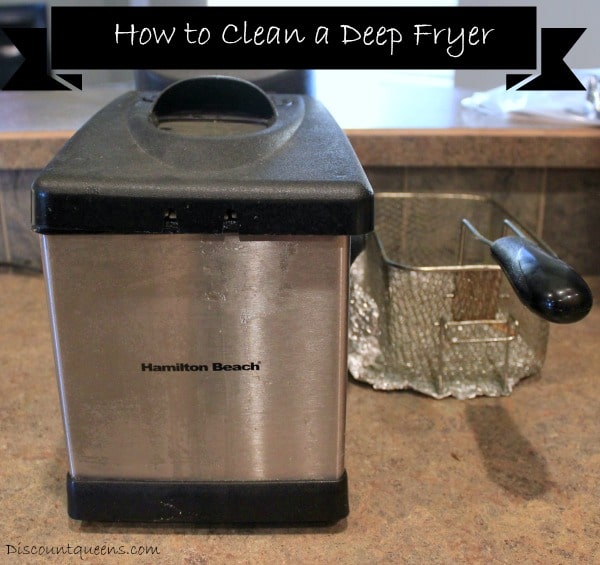 Here’s what you’re going to need:
- Oil (vegetable, olive, peanut…it doesn’t really matter)
- Baking Soda
- Dawn or other soap that’s tough enough to eat away grease
- Plastic Scrubbing Brush
- Wash Cloth
- Paper towels or Cotton Balls
- Water
The first thing you want to do is dispose of your old oil. Once it’s cleared out, we can get to the nitty-gritty. Unplug your appliance and be sure NOTHING is hot. You may just want to wait to do this on a day that it’s not in use; better safe than sorry. Next, make like a mechanic and pull your appliance apart. Remove the basket, the lid, the filters, the coil, and the oil tub. If you cannot pull your oil tub out, go ahead and skip this part (I’ll cover cleaning this further in the post). Use a paper towel to remove any remaining oil from the bottom of the oil tub.  Now, place all the removable parts (except for the coil) into a sink full of hot soapy water. Let it soak for at least 30 minutes.
  Lets move on to cleaning the outside of the fryer while the parts are sitting in the sink…. Coat a cotton ball or the corner of a paper towel in oil, then dip it into a bit of baking soda. Now, gently rub the mixture onto the outside of the fryer. This ingredient combination works well to remove stubborn oil splatter.
 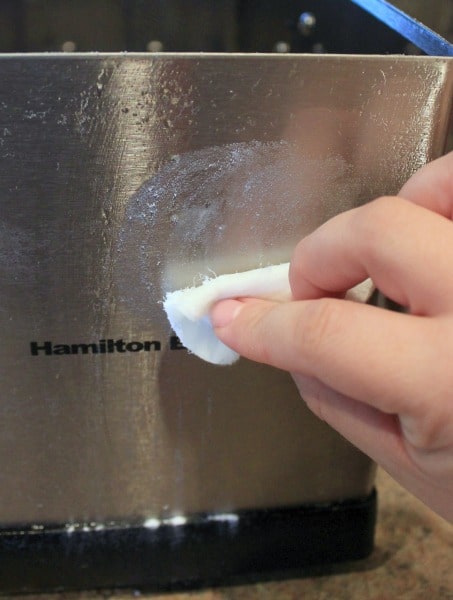 Once the outside of the fryer is completely covered in your mixture, use a kitchen towel soaked in the hottest water you can stand, to remove the oil/baking soda combination. You may need to use a bit of elbow grease here to get the really stubborn stuff off.
 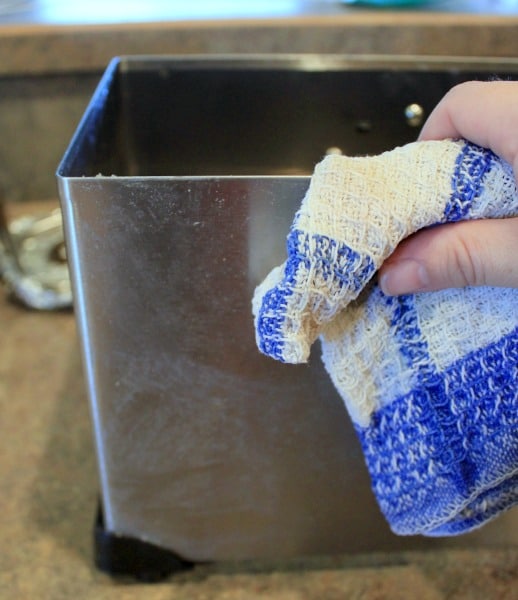 Set it aside and go back to the soaking parts in the sink… Use a plastic scrubber and lots of elbow grease to scrub the really stuck on oil off your appliance parts.
 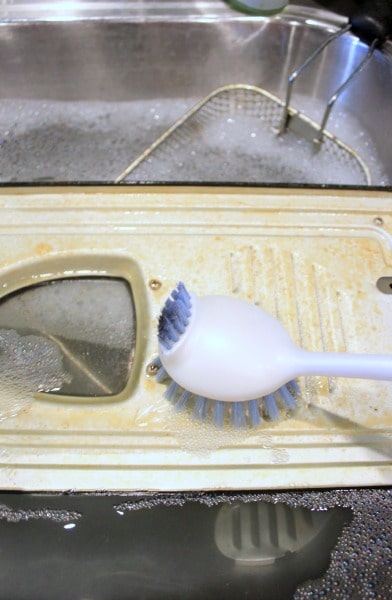 If it doesn’t all come off the first time (mine didn’t) go ahead and drain the water and put fresh hot water and soap into your sink. Then, let your appliance parts sit in the mixture overnight. In the morning, do a second scrubbing to remove the remaining oil. If I had an extra toothbrush laying around, I would have used it to get into the corners and crevices of the lid but I didn’t, so I skipped that part. 😉 Once clean, set aside to dry.
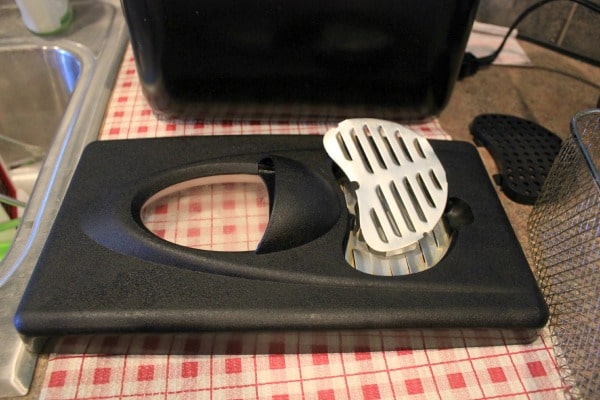 Now, if you’re one of the folks that has an oil tub that cannot be removed, this is where you’re going to jump in. For everyone else, this is where we’re going to clean the coils. Place the oil tub back into the frame of the fryer and attach the coil. Next, add water to the oil tub up to the fill line and add a few drops of Dawn. Plug in and turn on your fryer and allow the water to boil.
 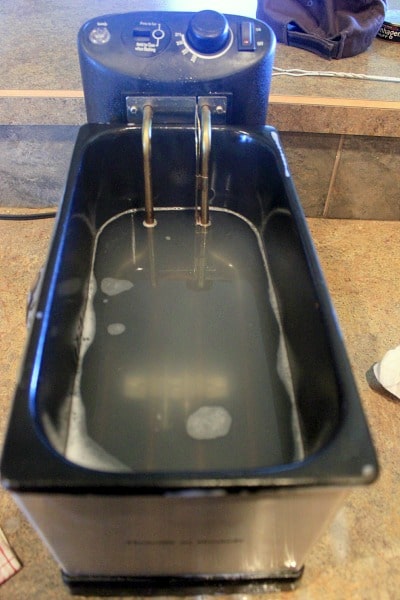 *DO NOT leave the appliance unattended! The soapy water WILL boil over if the appliance isn’t turned off before the water overheats. Once the soapy water begins to foam up, turn the appliance off and allow the water to cool completely. Now, unplug your appliance again and remove the coil. You will see that most of the stuck on oil was “melted off”.
 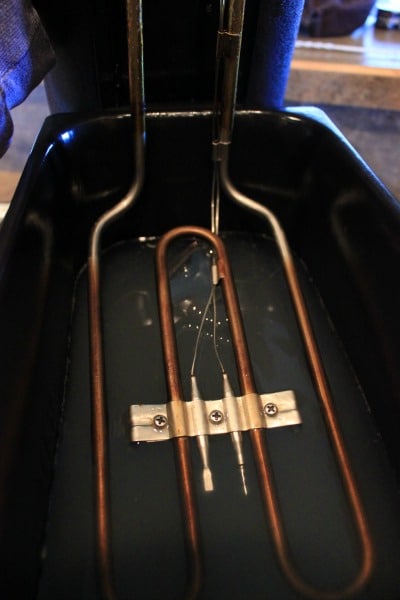 Run a cloth along the coil to remove any soapy residue and allow it to sit and air dry. *Back to our readers with an fixed oil tub, you may need to repeat this step a few times. Be sure to wipe the inside of the tub clean after each round. You’ll eventually wind up with a crud free oil tub. Dump the water and rinse the oil reserve until there are no more suds. Replace all the parts and fill with clean oil.
 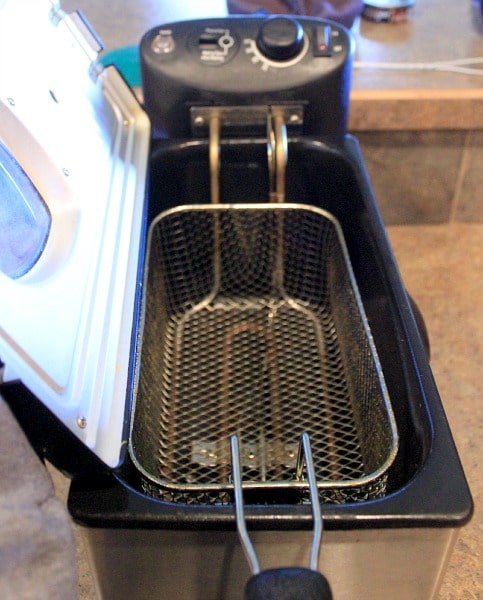 That’s it! After all this, you should have a squeaky clean deep fryer. Yes, this was a pain in the you know what but it’s less painful than having to buy a new appliance. 😉 Thanks for reading! Please remember to like, share, tweet, and pin this post.
[amd-zlrecipe-recipe:775]
Comments
Leave a Reply
More Related Diys


Trending DIY Projects
- DIY
- Recipes
- Deals
- Blog


Report a Problem
Please select the problem you are facing with this deal:
- Price Increased
- Price Decreased
- No longer available
- Expired
- Link doesn't work
- Suggestion
- Compliment
- Other
Add more details:
Thank you for your feedback. We really appreciate it.
Enter your email address if you would like
to receive a follow up.
Please Try Again
Thanks for providing the email address.
We will reach out to you as soon as possible.


Popular
Recommended
About Us

At Fabulessly Frugal, our goal is to help you live HEALTHY, WEALTHY, and WISE! My team and I work hard to bring you the best, online deals, clean eating, DIY's, freezer meal recipes, and more! I LOVE coaching and inspiring people to improve their health in my fitness challenge! You should also check out my favorite cleanse! Learn more about me and the rest of my team.

Copyright © 2008–2024
Fabulessly Frugal: A Coupon Blog Sharing Gift Ideas, Amazon Deals, Printable Coupons, DIY, How to Extreme Coupon, and Make Ahead Meals. All rights reserved
Can’t wait to try this!!! About how often do you clean your fryer?
I just clean it when it starts to get really gunky… so that depends on your use. If you use it a couple times a month or week, I would do this at least once a month. If you only use it a couple of times a year, I would do this after each use.