
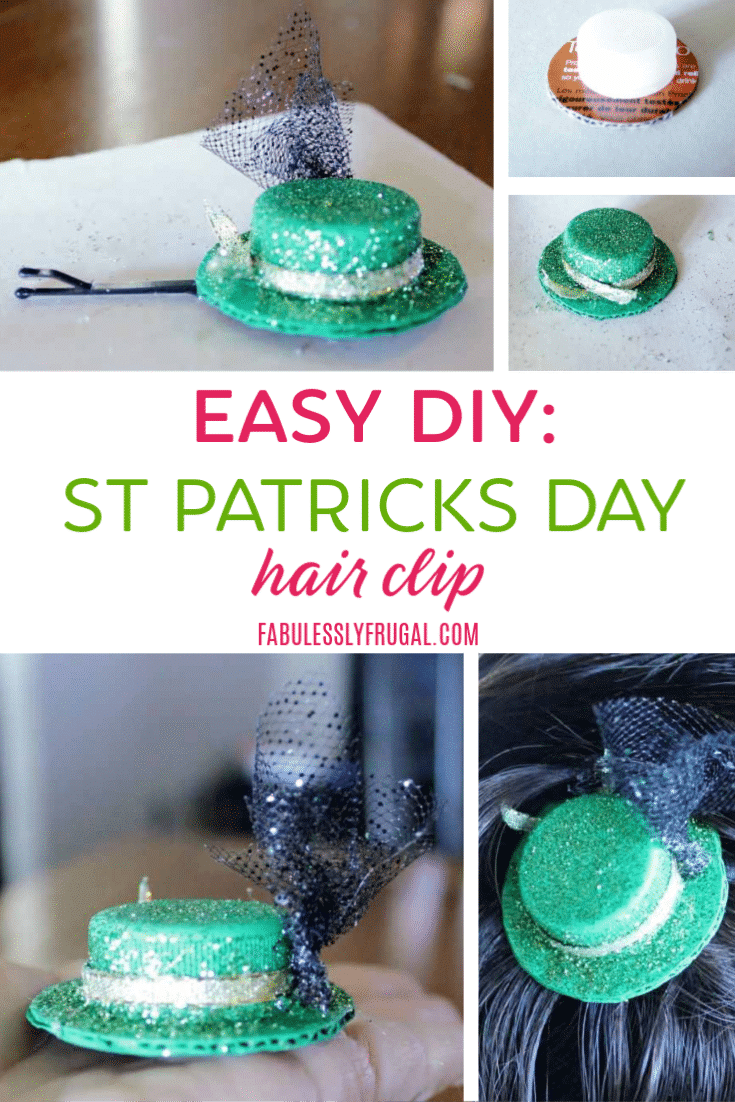
How to Make a Mini Hat Hair Clip for St. Patrick’s Day
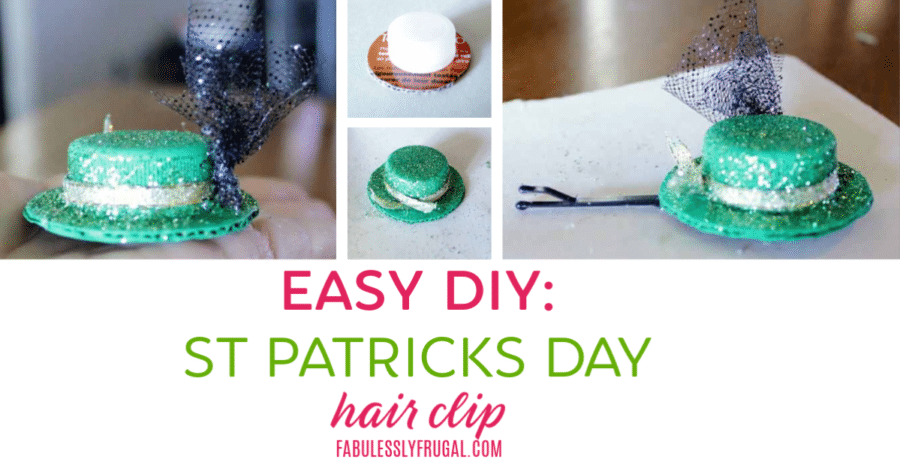
Easy DIY Mini Hat for St. Patrick’s Day
Ok. This is probably one of the best little projects I’ve come across. My mini hat hair clip turned out so cute, it was easy to make, and I love how easy it is to pin into my hair!
I originally got this idea when a friend of mine shared a YouTube video tutorial where this guy makes tiny hat hairpins. The ones he made were ADORABLE but I thought I would change the color scheme and turn this into a St. Patrick’s Day craft idea!
If you want to make a different looking mini hat for a themed costume, another holiday, or just for fun, you can totally do that too! These are super customizable and cheap to make.
Here’s what you need:
- Bottle cap
- Round template (anything bigger than your cap)
- Cardboard
- Green acrylic paint
- Green glitter
- Gold ribbon (thinner the better)
- Industrial glue (E-600 is the best)
- Black tulle
- Long Bobby Pins
- Scissors
- Paintbrush (foam ones work perfectly)
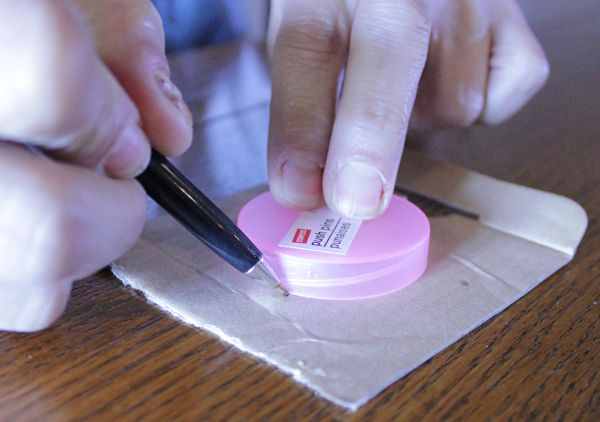
Step 1. Creating the Mini Hat Brim
Take your round template, place it on your cardboard, then trace around it with a pen or pencil (make sure your circle is just a bit larger than your bottle cap). Then, grab a pair of scissors and cut out your circle.

Step 2. Putting the Mini Hat Together
Glue your bottle cap to your cardboard circle and set it aside to dry.
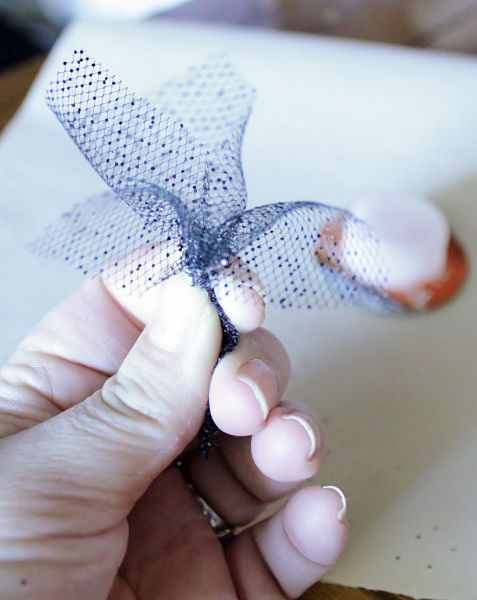
Step 3. Preparing the Tulle
While your mini hat is drying, take a SMALL piece of your black tulle and bunch it together. Then, glue the gathering point together. Once your tulle is glued well enough to stay put, trim the excess end off.
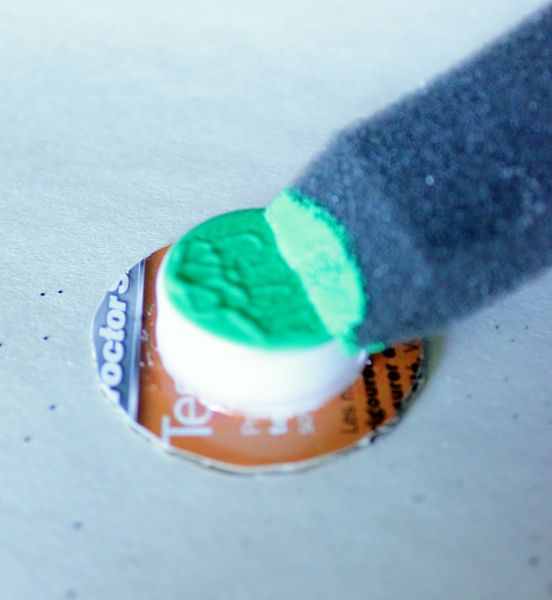
Step 4. Paint the Mini Hat
Now that your mini hat is glued and dried to the cardboard, dip your sponge into your green paint and completely coat your “hat”.
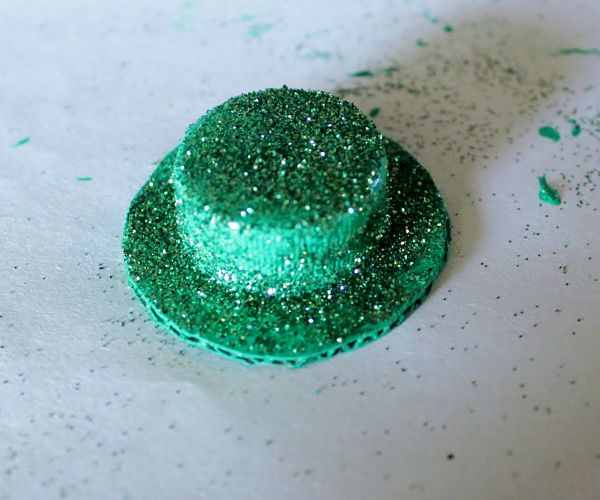
Step 5. Glitter!
Before it dries, sprinkle your hat generously in green glitter. The St. Patrick’s Day look is really starting to come together at this point.
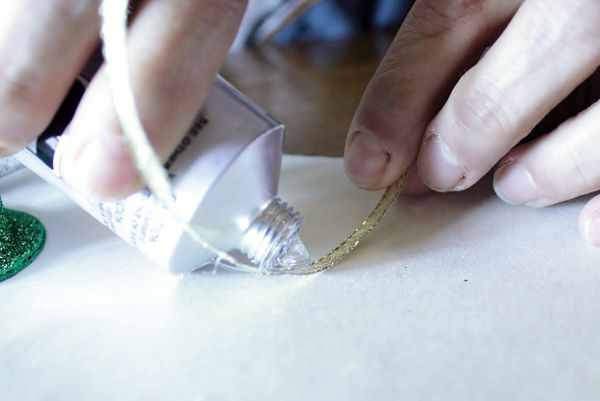
Step 6. Adding the Golden Ribbon
Cut a strip of your gold ribbon long enough to wrap around the base of your bottle cap. Then, add glue to the underside of your ribbon.
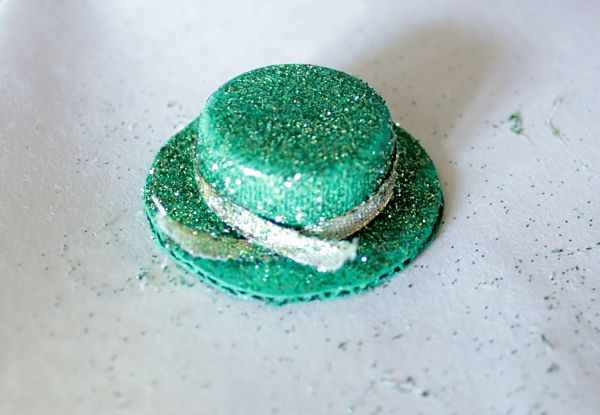
Once your ribbon has glue on it, place it around the base of your bottle cap.
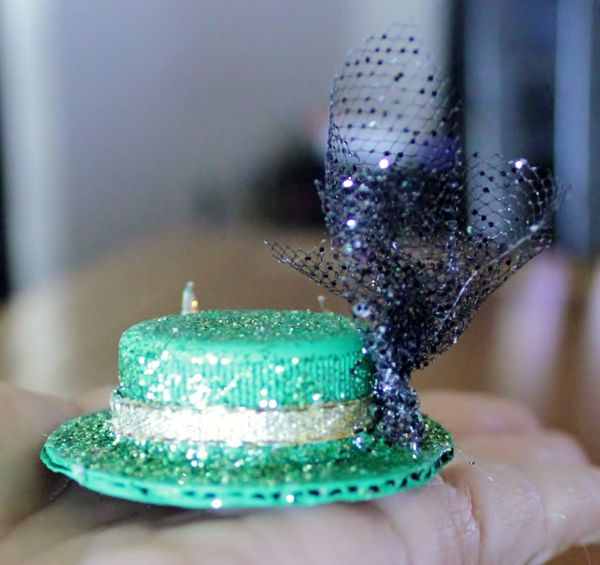
Step 8. Adding the Tulle
Next, take your bunched tulle and add a dab of glue to the base. Then, glue it to the side of your hat.
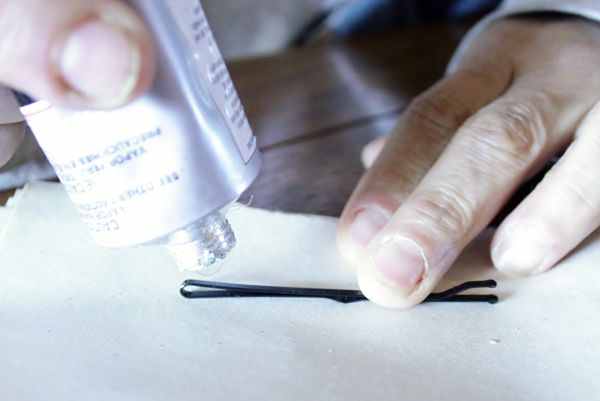
Step 9. Adding the Bobby Pin
While your glue is drying, grab a large bobby pin and add a drop of glue to the top.

Place your hat into place on your bobby pin and let dry. That’s all there is to it!
Final Thoughts
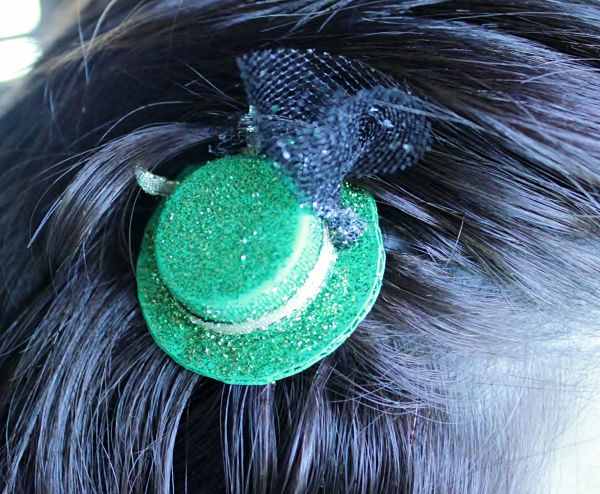
Ahh! I love it!! When St.Patty’s Day arrives you can simply slide your festive mini hat hair clip into your hair and celebrate in style!
I hope you enjoy making these simple, festive, and cute mini hats! Remember that you can customize them for basically any event as well, so don’t be scared to get creative.
If you enjoyed this craft, please share it on your favorite social network so your friends can see it too! Thanks!
More St. Patricks Day Ideas:
- 18 St. Patrick’s Day Treats
- DIY St. Patrick’s Day Block Sign Decoration
- St. Patrick’s Day Paper Crafts for Kids
How to Make a Mini Hat Hair Clip for St. Patrick’s Day

Ingredients
- Bottle cap
- Round template (anything bigger than your cap)
- Cardboard
- Green acrylic paint
- Green glitter
- Gold ribbon (thinner the better)
- Industrial glue (E-600 is the best)
- Black tulle
- Long Bobby Pins
- Scissors
- Paint brush (foam ones work perfectly)
Instructions
- Take your round template and place it on your cardboard. Make sure your circle is just a bit larger than your bottle cap.
- Cut out a circle (that is larger than your bottle cap)
- Glue the bottle cap to your cardboard circle and set aside.
- While it's drying, take a SMALL piece of your black tulle and bunch it together. Then, glue the gathering point together.
- Once your tulle is glued well enough to stay put, trim the excess end off.
- Dip a sponge into your green paint, and completely coat your "hat".
- Before it dries, sprinkle your hat generously in green glitter.
- Cut a strip of your gold ribbon long enough to wrap around the base of your bottle cap.
- Add glue to the underside of your ribbon and place it around the base of your bottle cap.
- Take your bunched tulle and add a dab of glue to the base and glue it to the side of your hat.
- While your glue is drying, grab a large bobby pin and add a drop of glue to the top.
- Place your hat into place on your bobby pin and let dry.
- When St.Patty's Day arrives, slide your festive hat pin into your hair and celebrate in style!
Comments
Leave a Reply
More Related Diys


Trending DIY Projects
- DIY
- Recipes
- Deals
- Blog


Report a Problem
Please select the problem you are facing with this deal:
- Price Increased
- Price Decreased
- No longer available
- Expired
- Link doesn't work
- Suggestion
- Compliment
- Other
Add more details:
Thank you for your feedback. We really appreciate it.
Enter your email address if you would like to receive a follow up.
Please Try Again
Thanks for providing the email address.
We will reach out to you as soon as possible.


Popular
Recommended
About Us

At Fabulessly Frugal, our goal is to help you live HEALTHY, WEALTHY, and WISE! My team and I work hard to bring you the best, online deals, clean eating, DIY's, freezer meal recipes, and more! I LOVE coaching and inspiring people to improve their health in my fitness challenge! You should also check out my favorite cleanse! Learn more about me and the rest of my team.


Copyright © 2008–2024
Fabulessly Frugal: A Coupon Blog Sharing Gift Ideas, Amazon Deals, Printable Coupons, DIY, How to Extreme Coupon, and Make Ahead Meals. All rights reserved
Great tutorial and idea! I wanted to make a little hat in Mary Poppins style to wear when we go to watch the stage show soon. I’ve used your method and now have a teeny Mary Poppins hat. It’s so cute! Thank you.